Global layout
 +86 769 2366 8529


Time:2026-05-07 Views:150
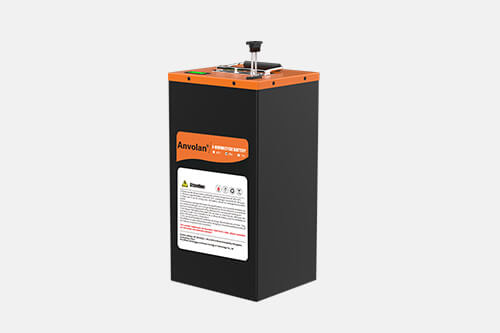
Installing a lead acid replacement battery correctly is critical to ensuring its performance, safety, and compatibility with the equipment it powers. Before starting the installation process, it is essential to conduct a thorough inspection of the battery and the installation environment to avoid potential risks such as short circuits, leakage, or reduced service life. First, verify that the replacement battery matches the original battery’s specifications, including voltage, capacity, physical dimensions, and terminal type (e.g., top post, side post, or bolt-on terminals). Using a battery with mismatched specifications can damage the equipment, cause overheating, or even lead to battery failure. Additionally, check the battery for any signs of damage, such as cracks in the case, leakage of electrolyte, or corroded terminals; if any damage is found, do not install the battery and contact the manufacturer for a replacement.
The installation environment must be clean, dry, well-ventilated, and free from extreme temperatures. Lead acid replacement batteries should be installed in a location where the temperature remains between 10°C and 30°C (50°F and 86°F) to optimize performance; avoid installing them in direct sunlight, near heat sources (such as engines, radiators, or heaters), or in areas prone to moisture, as high temperatures can accelerate internal chemical reactions and shorten battery life, while moisture can cause corrosion of terminals and electrical components. Before installing the battery, disconnect the power supply of the equipment to prevent short circuits during the installation process. When handling the battery, use insulated gloves and avoid dropping or jarring it, as this can damage the internal plates and cause electrolyte leakage.
During installation, ensure that the battery is securely fastened to prevent movement during operation, which can damage the terminals or internal components. Connect the positive terminal first (usually marked with a “+” sign) using the appropriate hardware, ensuring a tight and secure connection without over-tightening, which can strip the threads or damage the terminal. Then connect the negative terminal (marked with a “-” sign) and double-check the connections to ensure they are not reversed, as reversed polarity can cause severe damage to the equipment and the battery. After installation, apply a thin layer of anti-corrosion grease or terminal protectant to the terminals to prevent rust and corrosion. Finally, reconnect the power supply, test the equipment to ensure it is functioning properly, and check for any signs of abnormal heat, leakage, or unusual noise from the battery.
Be the first to receive our latest news, how-to user guides,
and exclusive deals! Subscribe now.

 Headquarter Address:10F, Building 25, N0. 179 Fengguan, Dongshen Road, Dongguan, Guangdong
 Factory Address: Building 3, Area D, Shengyang Science and Technology Industrial Park, East District of Suichuan County Industrial Park, Ji'an City, Jiangxi Province
 Headquarter Telephone No.: +86 769 2366 8529
Factory Telephone No.: +86 796 6111618
 Contact Person:Kevin Chen
 Email Address:chen@xpower-world.com